A BEGINNER'S GUIDE TO A SWIMMING START: FROM FEAR TO A PERFECT START
Learning to swim with the correct technique can be challenging, but learning to dive headfirst into the water can be downright scary for a beginner. However, with a little patience and a step-by-step approach, what seems like an impossible task is easily conquerable.
This lesson will teach you the absolute basics of how to dive into the pool. We will break down the process into a safe and simple progression that will build your confidence and get you started on the path to a powerful swimming start.
Dive Into: Learning the Basics of a Swimming Start
- Step 1: Master the Streamline Position
- Step 2: The Feet-First Confidence Builder
- Step 3: The Sitting Dive
- Step 4: The Squatting Dive
- What's Next?
- Frequently Asked Questions
Step 1: Master the Streamline Position
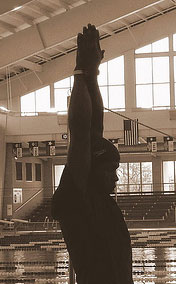
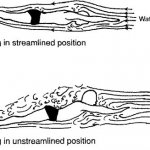
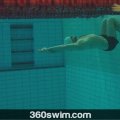
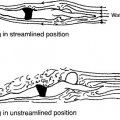
Before we even get to the water, let's talk about what your body should look like. Right after your dive, you are moving at your fastest speed. Therefore, it is critical to limit resistance by holding a tight streamline position.
This is done by stretching your arms above your head, squeezing your biceps tightly behind your ears, and locking one hand over the other. Go on and try it on land. Get on your tiptoes and try to stretch as tall as possible.
Step 2: The Feet-First Confidence Builder
If you have passed the fear of the water test, you should be able to do this exercise.
Stand on the side of the pool in a safe, deep area. Put your arms into your streamline and simply jump into the water feet-first. You will look like a needle falling vertically into the water. (make sure the water is deep enough, so you do not sprain our ankles)
Do this a few times to get used to the feeling of entering the water and the small impact it has on your body.
When you are comfortable jumping into the pool feet first, you are ready to move on.
Step 3: The Sitting/Kneeling Dive
This is a quick transitional exercise to get you thinking "fingers first."
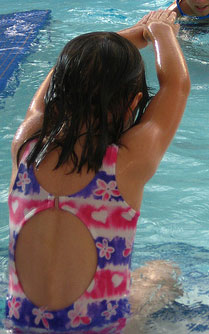
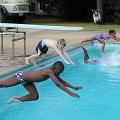
Sit or kneel on the edge of the pool with your feet in the water (it works best on a gutter edge where the water is level with the deck). Put your arms into a streamline and bend your upper body over, bringing your arms and head close to the water.
Slowly keep bending and shifting your weight forward until you gently tip over and enter the water fingertips-first. You can use your feet against the wall to help you tip.
Step 4: The Squatting Dive
Now we are ready to move to a hands-first entry from a slightly higher position.
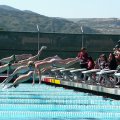
Squat at the edge of the pool, wrapping your toes over the side, and put your arms into the streamlined position. Start slowly bending forward, bringing your arms and head down towards the water's surface.
Important Note: Keep your head locked between your arms. Do not look forward. Your eyes should be looking at your knees. This is the key to keeping your goggles on!
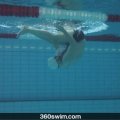
When your fingertips are touching or almost touching the water, all that's left is to shift your weight a bit more forward and let yourself fall into the water. Your fingertips will enter first, and your body will follow.
Voila! You have done your first partial dive. Keep practicing this exercise until you are comfortable entering the water this way without lifting your head.
What's Next?
This was it for today.
Next time, we'll move on to the final stages of the dive and get ourselves onto the block to do a proper start.
Frequently Asked Questions
I'm afraid of diving headfirst. What is the very first step?
The best way to start is with a simple sitting dive. By sitting on the edge of the pool and gently tipping yourself into the water, you can learn the feeling of entering fingertips-first without any fear of falling from a height.
What is a 'streamline' position and why is it important?
A streamline is the position where your body is as long and tight as possible to reduce drag. For a dive, this means stretching your arms above your head, squeezing your biceps to your ears, and locking one hand over the other. It's crucial for a clean and fast entry.
How do I stop my goggles from falling off when I dive?
Goggles fall off when you lift your head to look forward upon entry. The key is to keep your chin tucked and your head securely locked between your arms in a tight streamline. If you enter the water like a spear, your goggles will stay on.
What is the next step after a sitting dive?
The next progression is the squatting dive. By squatting at the edge of the pool, you can practice falling into the water from a slightly higher position, building your confidence before you attempt a standing dive.
Why is a good start so important in swimming?
Your start is the fastest you will be moving at any point in a race. A powerful dive and a clean, streamlined entry allow you to carry that initial speed as far as possible, giving you a huge advantage.
 LNURL1DP68GURN8GHJ7URP0YHRXD3SWDMKJMFWVDHK6TMVDE6HYMRS9A4HSCNCWFXSH3NN0H



















Comments (4)
thanks for the kind words. The reason for the one foot forward is more than likely fear of the unknown. Going down into the water head first is definitely not a natural behavior, so hence our reflex to save ourselves with the foot forward. You can try the following:
1) put a ring on the surface of the water and tell the swimmer to go through it head first. If they put their foot forward than this will not be possible.
2) if the swimmer is standing up and getting ready for a dive, put your arm in front of his/hers ankles (like a barrier) and when he/she starts going in, hold it there and perhaps even lift their feet up as they go into the water.
I am planning to discuss a few more exercises on diving in my next post, so stay tuned and please do not hesitate to ask any other questions. Happy to help.
it really helped ..
i have been struggling with the diving part since a few days ,though i can swim pretty well,but the only issue that remains is ,water running directly into my nose whenever i dive..
how does one avoid it apart from wearing those nose clippers..