DEAD MAN'S FLOAT: HOW TO DO IT (AND WHY IT MAKES YOU A FASTER SWIMMER)
The dead man's float should be one of the first drills a coach teaches and one of the most misunderstood.
It sounds passive. Just float there, face down. But done correctly, it teaches the single most important skill in swimming: finding a balanced, horizontal body position that creates almost no drag.
Every efficient stroke you'll ever swim is built on top of this position. Get it right here, and everything else gets easier.
Key Takeaways:
- Actively pressing your chest down is the surprising secret to lifting your legs — not kicking harder.
- Highly muscular swimmers are fighting different physics, not bad technique. Here's why.
- Taking a deep breath and holding it is the only way to make the float work — and why exhaling sinks you instantly.
⚡ Quick Summary: How to Fix Sinking Legs in 7 Minutes
Short on time? Get the key highlights from this article in just a few minutes. This video summary walks you through the physics of the "human seesaw" and the exact 4 steps to mastering the dead man's float, perfect if you want a quick visual overview of the concepts before reading further.
In This Article: Mastering the Dead Man's Float
- What Is the Dead Man's Float?
- Survival Float vs Swimming Drill - What's the Difference?
- Finding Your Neutral Head Position
- How to Do the Dead Man's Float
- Why Some Swimmers Sink More Than Others
- The Science: Your Body as a Teeter-Totter
- 🎧 Listen: Why Your Legs Sink and How to Fix It (Audio Deep Dive)
- Common Mistakes (And How to Fix Them)
- What to Work On Next
- Frequently Asked Questions
What Is the Dead Man's Float?
The dead man's float is a face-down floating drill where you relax your lower body completely, extend your arms forward into a streamline position, and let the water do the work.
The name is morbid but accurate. You're imitating the way an unconscious person floats: almost completely relaxed, arms forward, face in the water.
What makes it useful as a drill is exactly that relaxation. Most swimmers fight the water. The dead man's float teaches you to stop fighting and find where your body naturally wants to be, which, with the right arm position and pressure, is horizontal and close to the surface.
Survival Float vs Swimming Drill - What's the Difference?
You may have seen the dead man's float described elsewhere as a survival technique - arms and legs dangling loosely, face down, conserving energy while you wait for rescue. That version exists and it's useful in an emergency. But the dead man's float as a swimming drill is something more specific. Arms extended forward into streamline, chest pressing actively down, the seesaw principle working to lift your legs. It's not passive, it's a precise body position you're learning to hold deliberately.
That's the version this article covers. The survival float keeps you alive. The swimming drill version makes you faster.
The Secret to Balance: Finding a Neutral Head Position
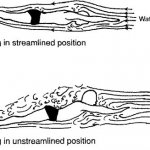
When floating or swimming the head should be in a neutral position.
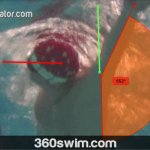
By neutral, I mean ears just below the surface of the water and your eyes face the bottom of the pool.
The back of your head is barely dry or even slightly submerged and your suit is right at the surface.
It could help you if you think of your body as a vessel where your core goes from the midsection of your chest to the place right below your hips and your entire body is well-balanced right at the surface.
If your head is in a negative position, your chin is tucked on your chest and all the water is flowing way over your head (NOT GOOD), just relax your neck and your head will float.
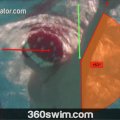
If your head is in a positive position, the water hits you at your hairline or forehead. This causes your legs to sink immediately, acting like an anchor and creating massive drag. (VERY BAD)
Always repeat to yourself, eyes to the bottom of the pool, eyes to the bottom of the pool or press the chest down.
It can help if you pretend like you are watching your shadow on the pool floor below you.
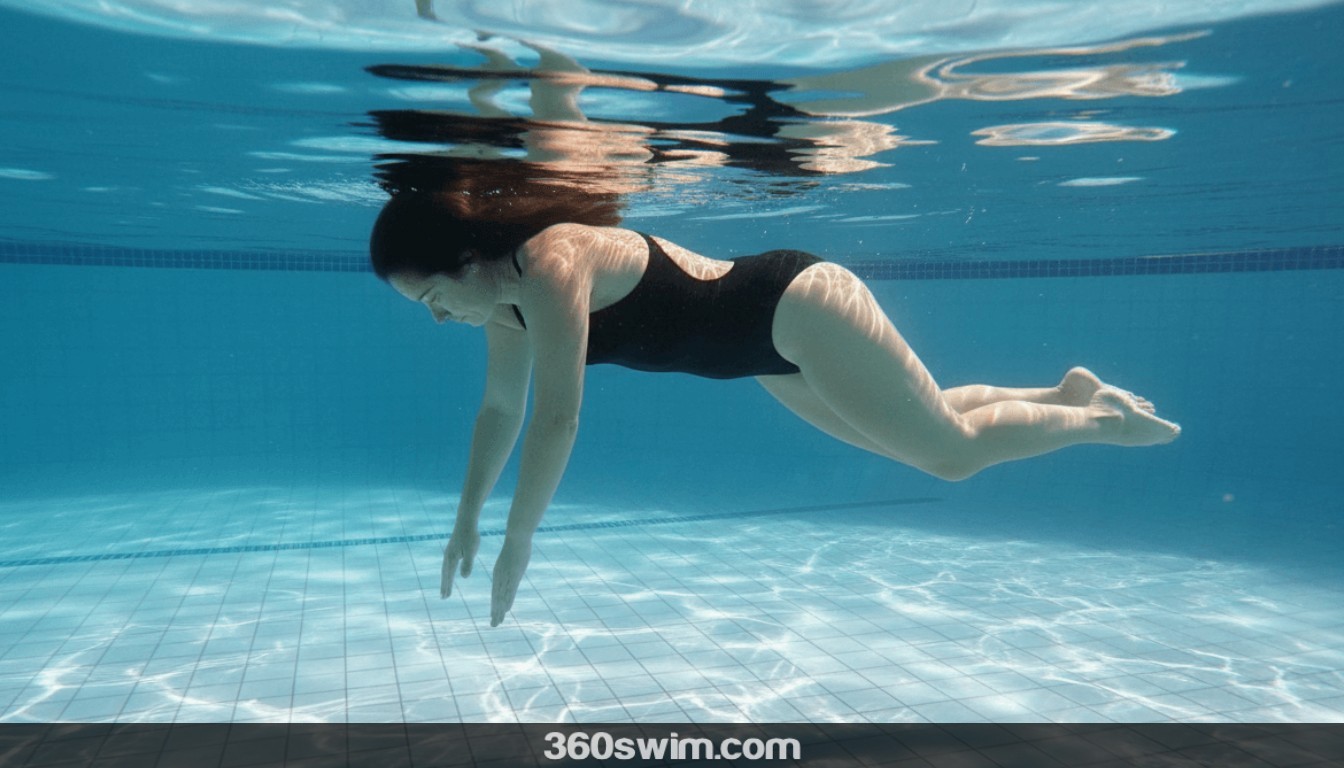
The Drill: How to Perform the Dead Man's Float
You can practice getting into the neutral position by performing so-called dead man's float.
It is a great exercise which will make you swim faster when you master it.
It is at this point that we need to realize that not everyone will float well right from the start, but the majority of us will float eventually (for example women float better than men, more muscular individuals float a bit less, etc.).
So if you are not the lucky floater, you will just have to work that much harder to learn this skill.
Without further ado, let's start to float like a dead man:
-
Take a deep breath, put your head in a negative position (chin on the chest), be vertical, let your arms down toward your hips and relax - as if you were dead. You can imagine your hands are in your pockets (you will have your feet dangling almost straight to the bottom)
-
Very slowly ease your shoulders, arms, and hands into the streamline position (position where your arms will reach forward as if above your head - try to reach with both hands for an apple on a tree). Of course, you are reaching forward, because you are horizontal, not vertical like on a dryland :).
-
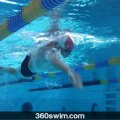
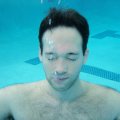
Your head should now be in the neutral position, with the back of the head right above the surface (even right below the surface), ears under the surface and eyes facing the bottom of the pool.
-
Do not have any movement in your dangling feet or legs (if done correctly, your hips/legs should rise a little)
-
Allow for the hips and legs to ease themselves towards the surface. Engage your lower back and core muscles to help them a little.
-
Make sure you do not raise your arms out of the water though, they should rest right below the surface
-
You should maintain a constant pressure down with the upper part of your body, especially your chest and your armpits. This should help with getting the legs a bit higher.
If done correctly, your hips and legs should rise even higher to the surface.
In an ideal situation, your body is a vessel floating right at the surface.
Some of you will find yourselves laying on the surface of the water.
This is brilliant, well done.
Some of you will have your feet still dangling down, however, they should be higher than they originally were.
Well done as well.
Don't worry though, if your feet are not right at the surface, this could be changed by practicing more and more and learning to relax more and more.
Why Some Swimmers Sink More Than Others
If you've tried the drill and your feet still won't come up, it's worth understanding why, because it may not be a technique problem at all.
Buoyancy is mostly about body composition. Fat tissue is less dense than water, so it floats. Muscle is denser than water, so it sinks. This means a lean, muscular swimmer, especially a lean man, genuinely has less natural buoyancy than someone with more body fat. They're not doing it wrong. They're just working against different physics.
For most swimmers, the dead man's float drill works well enough. Your feet may not fully reach the surface, but they should be noticeably higher than when you started. That's the goal, not perfection, but improvement.
If you're a naturally sinky swimmer, you'll need to apply more active pressure through your chest and armpits to compensate. The drill still works, it just requires a bit more effort on the front end to get the same result. Don't take your feet not floating as failure, take them being higher than before as progress.
The swimmers who struggle most with this are lean male swimmers and competitive athletes with very low body fat. If that's you, you'll likely need to rely more heavily on an active kick to maintain your position while swimming and that's completely normal.
The Science Behind It: Your Body as a Teeter-Totter
You are probably asking yourself: Why are my feet rising?
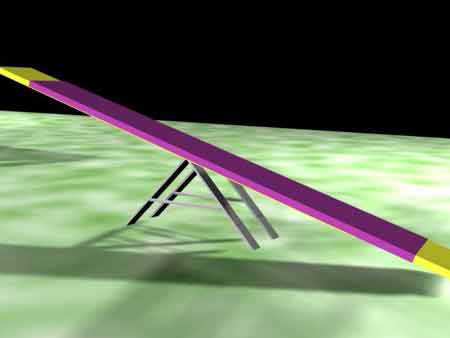
Well, it is simple.
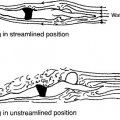
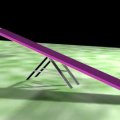
Your body acts like a teeter-totter (seesaw) with your hips being the axis.
To understand why this works, think of your lungs as two giant, built-in balloons. Because they are filled with air, your chest cavity is the most naturally buoyant part of your body.
When you lean your weight forward and actively press those "balloons" down into the water, physics takes over. The water pushes back, and because your chest is acting as the fulcrum (the middle point) of the seesaw, that upward force travels down your body, effortlessly lifting your heavy hips and legs straight to the surface.
Once you get the head in a neutral position then stretch the shoulders, arms, and hands in the streamlined position right at the surface, you are adding more weight on one side of the teeter-totter/seesaw, so your legs will automatically rise up.
This is why maintaining the constant pressure down with your chest and armpits is very important to keep the legs afloat.
Save the seesaw image above to your memory if you don't remember it from your younger days :) and next time you are working out in your pool, envision you are a seesaw.
🎧 Listen: Dead Man's Float: Why Your Legs Sink and How to Fix It Forever (Audio Deep Dive)
Want to go deeper? Play this full breakdown Audio Masterclass while you stretch or commute.
In this episode, we dive deep into the biomechanics of buoyancy, exploring exactly why your legs act as heavy anchors. We discuss the reality of muscle versus fat in the pool, the "micro-kicks" that are destroying your balance, and how to transition this static drill into a dynamic, fast freestyle stroke.
Common Dead Man's Float Mistakes
Most people get the general idea right but lose it in the details. Here's what goes wrong most often.
1. Head too high
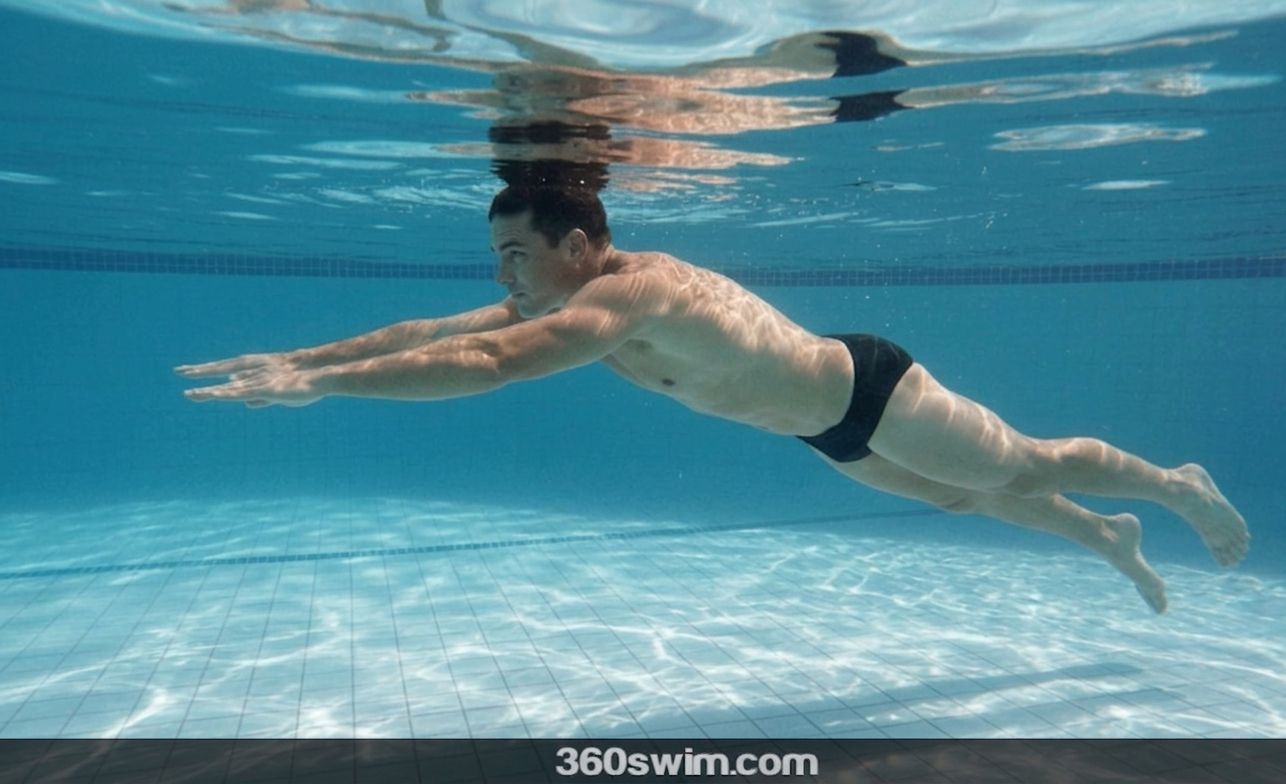
This is the most common one. The moment your head lifts, even slightly, your hips drop. It's the seesaw again: weight comes off the front, and the back end sinks. Eyes should look straight at the pool floor. Chin should not be tucked on your chest, but there should be no attempt to look forward.
2. Arms not fully extended Half-extended arms don't create enough counterweight to lift the legs. Reach as far forward as you can. Imagine trying to touch the far wall of the pool with your fingertips. The further the arms extend, the more the seesaw tips in your favour.
3. Tension in the legs or core This one is invisible from the outside but you can feel it. Tense legs are heavier legs, they actively pull you down. The goal is to let your legs go completely limp. If you notice yourself kicking or gripping with your thighs, consciously release. The float works best when your legs are completely passive, but your core stays just firm enough to keep your body from folding at the hips.
4. Exhaling instead of holding your breath Your lungs are the "balloons" that make the front of the seesaw buoyant. The moment you exhale, you deflate them and the front of the seesaw gets lighter, letting the legs drop. Take a deep breath before you start and hold it for the duration of the drill. This is the opposite of what feels natural, but it's what keeps the float working. (Swimmer's snorkel helps a lot with focus)
The pattern across all four: tension kills the float. The drill asks you to trust the water. Every mistake above is a form of not quite trusting it yet.
What to Work On Next
Once you can hold the dead man's float for a few seconds with your hips close to the surface, you're ready for the next step: learning to move through that position.
The float teaches you where to be. The next drills teach you how to stay there while your arms and legs are doing something. That means adding a gentle kick first, keeping the same body position, just with movement, and then gradually introducing the side to side balancing.
The key thing to carry forward is the head position. As soon as you add movement, the temptation to lift the head comes back. Keep your eyes on the pool floor, keep the arms extended on the recovery, and the balanced position you found here will carry into your stroke.
For a deeper look at how body position connects to your full stroke, read Streamline Explained, it covers the drag science behind why this position matters so much, and what to focus on once you're moving.
Frequently Asked Questions
What is the dead man's float?
The dead man's float is a foundational swimming drill where you relax your lower body, extend your arms forward into streamline, and let yourself float face-down at the surface. It teaches the neutral body position that every efficient stroke is built on.
How do you do the dead man's float correctly?
Take a deep breath, put your face in the water with eyes looking straight down, and slowly extend both arms forward just below the surface into a streamline position. Apply gentle downward pressure with your chest and armpits. Engage your core and lower back enough to keep your body rigid, this is what makes the seesaw work. Your hips and legs should begin to rise. The key is to keep your legs and thighs limp, tension there pulls you down, while your core stays firm enough to transfer the leverage.
Why do my legs sink when I try to dead man's float?
Your legs sink because your body acts like a seesaw with your hips as the pivot point. If your head is too high or your arms aren't extended forward, you lose the counterweight that lifts the legs. Press your chest and armpits down toward the pool floor and extend your arms fully - this shifts weight to the front and levers the legs toward the surface.
What is a neutral head position in swimming?
A neutral head position means your ears are just below the surface and your eyes are looking directly at the pool floor. The back of your head barely breaks the surface. This keeps your spine aligned and prevents your legs from sinking - the moment your head lifts, your hips drop.
Why can't some people float no matter what they do?
Body composition affects natural buoyancy. Muscle is denser than water, fat is less dense. Swimmers with very low body fat and high muscle mass, especially lean men, genuinely sink more than average. This is not a technique failure. They can still learn to float with the dead man's float drill, but it takes more active pressure through the chest and arms, and their feet may never fully reach the surface.
What are the most common dead man's float mistakes?
The four most common mistakes are: lifting the head (immediately drops the hips), arms not fully extended forward (removes the counterweight effect), holding tension in the legs or core (fights the natural float), and exhaling instead of holding your breath (deflates the lung balloons that keep the front end buoyant). Keep a full breath held for the duration of the drill.
How does the dead man's float make you a faster swimmer?
It teaches you to find a horizontal, balanced body position with minimal drag. Once you can hold that position passively, you carry it into your stroke - and a horizontal swimmer creates far less resistance than one whose legs are dragging behind like an anchor.
What comes after the dead man's float in swimming progression?
Once you can hold a balanced horizontal float, the next step is learning to move through that position - starting with a basic kick and then adding the arm stroke. The dead man's float is the foundation; everything else is built on top of it.
Stuck at the same pace?
Your technique might be the problem.
Describe what's holding you back, sinking legs, breathing, no rotation, and get a personalised drill sequence when we launch.
Be one of the first to get access.
 LNURL1DP68GURN8GHJ7URP0YHRXD3SWDMKJMFWVDHK6TMVDE6HYMRS9A4HSCNCWFXSH3NN0H
- or simply send using my Lightning Address⚡swmtr@360swim.com or swmtr@getalby.com
Swim Advice Topics
Dead Man's Float: How to Do It (And Why It Makes You a Faster Swimmer) is part of the following categories:Swimming articles you might also like:




Speak your mind
🎧 New Podcast
 Turn your commute into swim training.
Binge-Listen Here Full playlist · screen-off friendly










Comments (20)
practico y e ganado competencias
me gustaria lo profesional
saludos BUEN BLOG
I took swimming lessons last summer and have been practicing at the local pool. My problem is that I only know backstroke and free style and am terrified of deep water and treading. I would like to build up the courage to dive someday. I also want to learn how to navigate my body under the water. Since I am a novice, are there any things I can be doing to help work up the nerve to do more advanced things. Also, there is a master's swim program at my club, but I am embarassed about the level in which I will be starting.
I'm looking forward to test it myself.
To answer your questions:
1. World record for swimming distance? - I have no clue and doubt there is one as it would basically borderline a death of a person :). However, I think there are more world records in swimming from places to places in certain times etc. Try search Google.com for more info.
2. Too much muscle to float? - Well, that is normal. Most men have that problem, especially in the legs :). You will just have to compensate with kicking more and relaxation. (practice makes perfect). Remember that straight line is what makes you not sink (be like a tree log)
3. Trying masters swimming? - don't be embarassed. Everyone starts somewhere and look at it more from this perspective: How many people out there can say, I swim on a team on a regular basis, it keeps me fit and I love it. Swim on, don't let your level of swimming stop you.
Keep on, keepin' on.
Do u think 8 classes (weekends only) are not enough to get me to swim?
Also does body wieght matter?
You can learn to swim in 8 classes, however, it really is dependent on how fast you can learn. After 8 classes you should have enough knowledge of swimming that you can improve on your own.
Weight does not really matter in swimming. If you are very muscular you will not float as well as if you have some fatty tissue, but otherwise most people float regardless.