LEGS OF STEEL (KEEP YOUR LEGS FROM SINKING DURING FREESTYLE OR WHILE FLOATING)
Sinking legs are one of the most common and frustrating problems in swimming. The cause, and the solution, almost always comes back to one fundamental skill: the position of your head.
This guide is a follow-up to the "Tree Log" lesson, reinforcing why your head position is the building block of your stroke and providing a new drill to help you learn to breathe without your legs dropping like a rock.
Dive Into: Your Guide to Fixing Sinking Legs
- Why Head Position is the Ultimate Fix
- Quick Fixes If Your Legs Still Sink
- How to Breathe for Better Balance
- The "Roll to Your Back" Breathing Drill
- Frequently Asked Questions
Why Head Position is the Ultimate Fix
This is an additional post on proper head position while swimming freestyle.
I know you might be tired of hearing the words "put your head down" while you swim, however, believe me, if I tell you, this is the building block of your swimming.
Without the proper head position, your stroke will not be as efficient as it could be and you will always work a bit harder and get easily tired.
One other reason I decided to write up one more post about the proper head position in freestyle is the simple fact of repetition and word association.
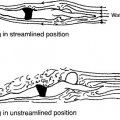
Imagine I was standing on a pool deck and watch you swim and once in a while I'd tell you to put your head down into the water, so you are more streamlined and your legs rise up. After a little while, every time you swim and you just catch the glimpse of me strolling around the pool deck and perhaps watching you swim, a switch in your head will say "ahh, is my head too high? put my head down", because you associated the trigger words with me.
In our case, here on the blog, you do not have me walking around the pool deck to repetitively remind you about the proper head position in freestyle, but if you are following my advice from the previous post you are well on your way and this post can only benefit you.
Quick Fixes If Your Legs Still Sink
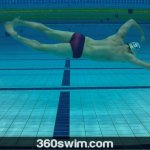
If you have done all the previous exercises pretending to be a tree log and extended tree log and your legs are still sinking, don't despair.
First, check if your head is in the right position.
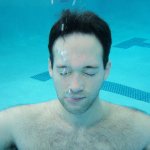
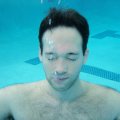
Don't be afraid to bury your head down in the water, even let some water go over your head, so you are floating with your head underwater. This should help a little.
Second, slightly increase your kicking and this will help to keep your legs up. Also, remember, we are not breathing yet.
The exercises are meant to be done only for a short period of time to get you used to the correct head position.
If you continue struggling with the sinking legs problem, you should check out the shinfin™ leg fins. This simple piece of equipment does wonders with sinking legs.
How to Breathe for Better Balance
When we are on the topic of breathing, before you start floating, take a deep breath, so your lungs are full of air and keep you at the surface without problems, then when you start floating, keep exhaling your air at a very steady slow rate (DO NOT hold your breath in).
You will see that it relaxes you more during the floating exercises to slowly let the air out.
You will also notice, that you will not be as tight and will very slowly start losing your buoyancy. When you run out of breath or you think you are starting to sink too much, just stand up and repeat the exercise.
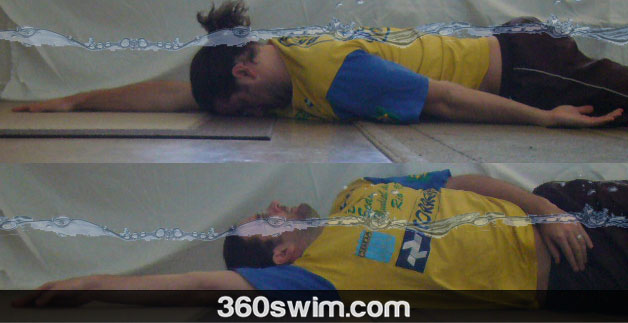
The "Roll to Your Back" Breathing Drill
The next step is to learn to take a breath without stopping.
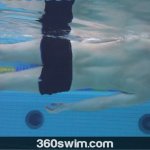
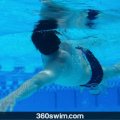
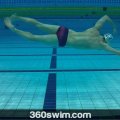
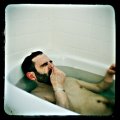
So, you are floating on your stomach in the half extended tree log position (like on the picture above. This is the same as a regular extended tree log position, except that only one arm is pointing forwards and one arm is at your side pointing backward.
Your head is still buried in the water (with the back of your head barely dry or just slightly underwater).
You are slowly exhaling your air out of your lungs and when it is time and you need to take a breath, slowly rotate your body to your side where your arm is extended forward and continue rotating until you are on your back and can take a nice breath.
How do you rotate to your back?
By using your kick and hips to rotate.
So, when you lay on your stomach with your right hand extended, start rotating your left hip up and right hip down, so you can roll to the right side on the extended arm. At the same time adjust your kick slightly to help you with the rotation (very teeny weeny scissor like kick).
So, that is it.
Add this breathing drill to your daily routine and we'll continue to build up our body position further in the next lesson about body balance.
Frequently Asked Questions
Why do my legs sink when I swim freestyle?
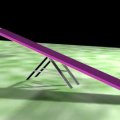
The number one cause of sinking legs is an incorrect head position. If you lift your head to look forward, your body acts like a teeter-totter, forcing your hips and legs to drop. Keeping your eyes looking down is the key.
My head is down, but my legs still sink. What else can I do?
Don't be afraid to bury your head even deeper, letting water flow over the back of it. You can also add a slight, steady kick for lift and focus on exhaling slowly and continuously to stay relaxed.
How does breathing affect my body position?
Lifting your head to breathe is the fastest way to make your legs sink. The goal is to rotate your body to breathe, not lift your head. Also, holding your breath makes you tense, while exhaling slowly underwater helps you relax and maintain balance.
What's a good drill to practice breathing without sinking?
The 'roll to your back' drill is perfect. Start by floating with one arm extended forward. When you need air, use your hips and kick to slowly rotate your entire body onto your back for a relaxed breath, then rotate back.
What is the most important building block for good swimming posture?
A correct and relaxed head position is the absolute building block of your entire stroke. Without it, you will always be fighting the water and struggling with inefficiency.
 LNURL1DP68GURN8GHJ7URP0YHRXD3SWDMKJMFWVDHK6TMVDE6HYMRS9A4HSCNCWFXSH3NN0H


